
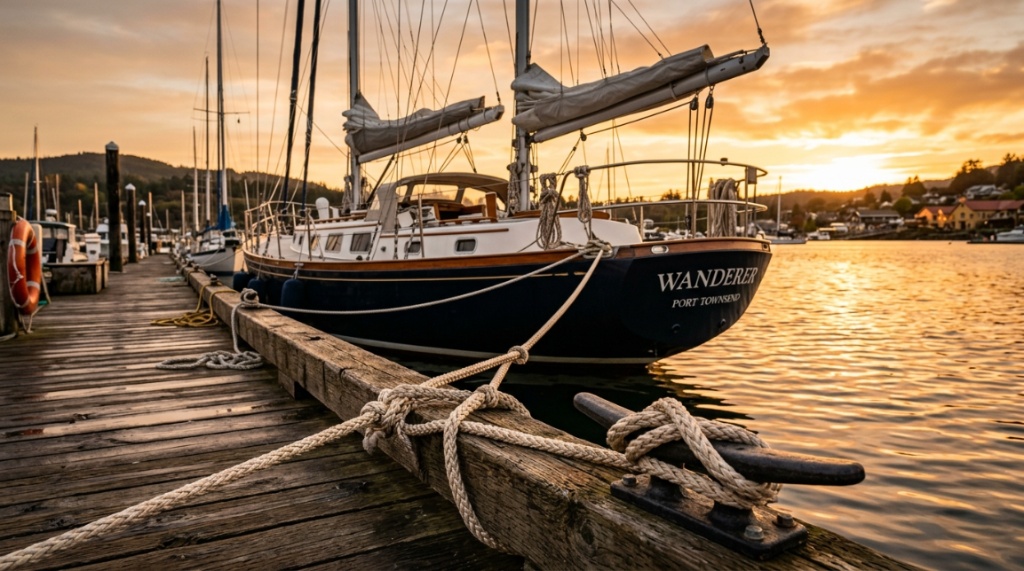
There’s nothing worse than watching your boat drift away from the dock, scrape against a piling, or worse, slam into a neighbor’s hull during a sudden squall. You’ve invested serious money in your vessel, yet many boaters trust their entire investment to frayed, mismatched, and undersized ropes. The problem is real: inadequate dock lines fail when you need them most. The solution is mastering the art of choosing and using strong dock lines correctly. This guide walks you through the exact materials, knot techniques, and securing strategies professional mariners use to keep boats safe in any condition.
What Makes a Dock Line “Strong” in Real-World Conditions?
Strength isn’t just about breaking point; it’s about how a line handles shock loads, abrasion, and UV degradation. A truly strong dock line combines high tensile strength with elasticity to absorb energy from waves and wakes.
Breaking Strength vs. Working Load
Breaking strength is the point where the line snaps. Working load is the safe weight you can routinely put on it—typically 10% to 20% of the breaking strength. For a 30-foot boat, a line with 5,000 lbs breaking strength is sufficient. For a 50-foot yacht, you need at least 12,000 lbs. Always check the manufacturer’s rating chart.
The Role of Elasticity in Shock Absorption
Nylon is the gold standard for dock lines because it stretches up to 30% under load. That stretch acts as a shock absorber, preventing sudden jerks from ripping cleats off your boat. Polyester and polypropylene lines have low stretch, making them unsafe for docking in choppy water.
Diameter and Construction Quality
Thicker isn’t always better—it must be appropriate for your boat size. For boats under 25 feet, 3/8-inch diameter is standard. For 30-40 foot vessels, use 1/2-inch lines. Look for double-braid construction: the outer braid protects the inner core, providing both strength and abrasion resistance.
Why Nylon Is the Superior Choice for Most Boat Docks
Nylon offers the perfect balance of strength, stretch, and durability. It’s the most forgiving material for dock lines because it absorbs kinetic energy without transferring stress to your boat’s hardware.
Pros of Nylon Dock Lines
- High shock absorption: Reduces stress on cleats and mooring points
- Excellent UV resistance: Withstands harsh sunlight without weakening quickly
- Superior abrasion resistance: Handles rubbing against concrete docks and pilings
- Easy to splice: Allows custom lengths and eye splices for permanent fittings
Cons of Nylon Dock Lines
- Absorbs water: Can freeze in winter if not dried properly
- Susceptible to mildew: Needs regular cleaning and drying
- Higher initial cost: More expensive than polyester but worth it
When to Use Polyester or Polypropylene Instead
Polyester is better if you need minimal stretch, like for a permanent mooring in calm water. Polypropylene floats, making it useful for dinghy painters, but it degrades quickly in UV and has low strength. Stick with nylon for nearly all docking scenarios.
How Many Dock Lines Do You Actually Need for Safe Docking?
At a minimum, you need four lines: two bow lines, two stern lines, and ideally two spring lines for long-term docking. This setup provides redundancy—if one line fails, others will hold you in place.
The Minimum Setup: Bow, Stern, and Springs
Bow and stern lines keep the boat close to the dock. Spring lines prevent forward and backward movement, which is critical when you’re away for extended periods. A boat held only by bow and stern lines will wander side-to-side and chafe.
How Line Length Affects Holding Power
Longer lines provide more elasticity and better shock absorption. A line that is too short acts like a steel cable—it transfers all load instantly. A good rule: your dock lines should be at least one and a half times the length of your boat.
Matching Line Count to Boat Size
| Boat Length (ft) | Minimum Lines Recommended | Typical Diameter |
|---|---|---|
| Under 20 | 4 (2 bow, 2 stern) | 3/8″ |
| 20-30 | 6 (add 2 springs) | 1/2″ |
| 30-40 | 8 (add more springs) | 5/8″ |
| Over 40 | 8-10 lines | 3/4″ |
These recommendations are conservative—boaters in areas with strong currents or storms should add extra lines regardless of boat size.
What Is the Best Knot for Attaching a Dock Line to a Cleat?
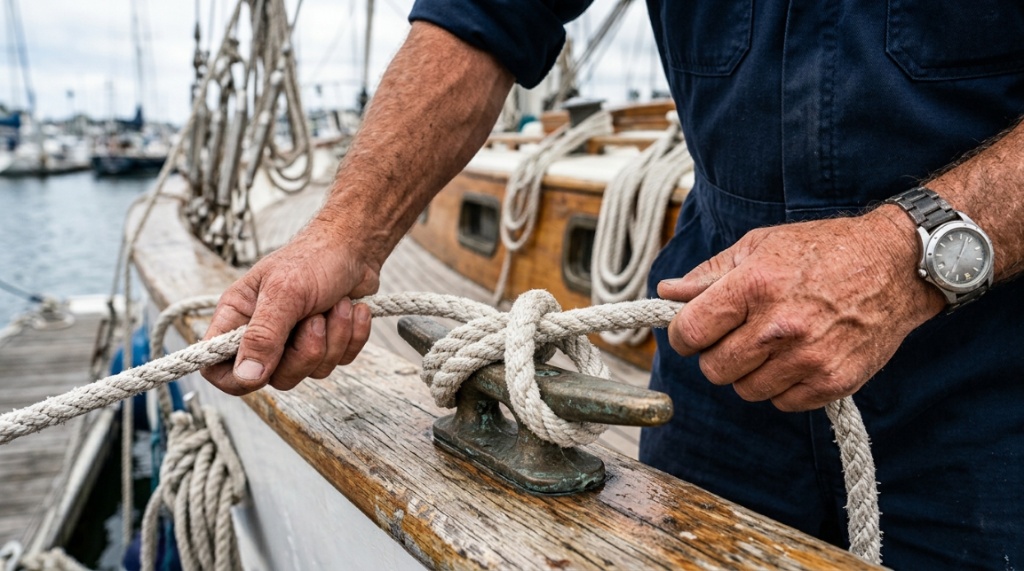
The cleat hitch is the industry standard for securing a line to a cleat. It’s quick to tie, easy to adjust, and won’t jam under load. Master this knot and you can secure your boat confidently in under ten seconds, To ensure you are fully prepared for your next waterfront adventure on the water, make sure to read our guide on how to Buy Your First Inflatable Paddle Board With Confidence.
Step-by-Step: How to Tie a Cleat Hitch
- Wrap the line around the base of the cleat one full turn.
- Bring the line over the top of the cleat’s horn (the side arm).
- Wrap diagonally across the top, looping under the opposite horn.
- Make a second diagonal wrap for extra security.
- Finish with a half-hitch around one horn; pull tight.
The result is a line that can be released quickly even under heavy load by simply flipping the final hitch off.
Common Mistakes When Tying to a Cleat
- Too few wraps: One wrap slips under strain.
- Overlapping wraps: Creates jams and makes release difficult.
- Not locking the end: The last half-hitch prevents unraveling.
Alternative Knots: Bowline and Rolling Hitch
The bowline creates a fixed loop in the end of the line, useful for dropping over a piling. The rolling hitch is perfect for tying a line to another line—like when you need to attach to a permanent mooring pendant. Practice all three before your next outing.
How Do You Attach a Dock Line to a Piling or Mooring?
For pilings, you have two solid options: the clove hitch for temporary tie-ups and a dedicated eye splice for permanent arrangements. Pilings require special attention because the line rubs against a rough surface.
Using a Clove Hitch for Temporary Docking
Throw two loops over the piling: one clockwise, one counterclockwise, then cross them. The clove hitch holds well but can slip if the piling is small and smooth. Use it only for short stays.
Installing a Permanent Eye Splice
An eye splice creates a secure, permanent loop in the end of the line. You simply drop the loop over the piling and use a rolling hitch to adjust tension. Splicing requires practice but reduces chafe because there are no knots in the line that can rub.
Protecting the Line from Chafe at the Piling
Always use a chafe guard—a rubber hose or leather sleeve—where the line contacts the piling. Friction from waves can saw through line in just hours during a storm. Inexpensive plastic coils or reinforced fabric covers work effectively.
How Do You Set Up Dock Lines for Different Tide Conditions?
Tides can either loosen your lines until the boat drifts away or tighten them until they snap. You must design a system that accommodates vertical water movement of six feet or more.
Adjusting for High Tide vs. Low Tide
In the Pacific Northwest and other tidal areas, a boat secured tightly at high tide will be hanging from its lines at low tide. Use lines that are long enough so they remain at a 45-degree angle from the dock to the boat. This angle allows for vertical movement without excessive tension change.
Using Sliding Rings or Pendant Systems
Professional marinas in tidal regions use a rising and falling system: a sliding ring that runs up a stationary piling, or floating dock that moves with the tide. If you must tie to a fixed dock, use long spring lines with additional slack and check them regularly.
Setting Up a Multi-Point Mooring
For areas with extreme tidal swings, use four spring lines (two bow-to-stern and two stern-to-bow) plus four bow/stern lines. This configuration distributes the load and allows the boat to move vertically without straining any single point. Check your lines at least twice daily during tide changes.
Can You Leave Your Boat Docked Unattended with Standard Lines?
Yes, but only if you upgrade from basic lines. Unattended docking requires more than just strong ropes—you need redundant systems, chafe protection, and proper slack management.
Preparing for Storms and Unexpected Weather
Weather can change quickly. Before leaving for a week, double up on lines—meaning two lines per cleat—and use lines that are oversized for your boat. A 40-foot boat should have 5/8-inch or larger double-braid nylon lines for storm protection.
Using Line Locks and Tensioners
Some boaters add mechanical line tensioners that adjust automatically as the boat rises and falls. These devices store energy and keep lines tight, preventing the boat from slamming against the dock. They cost around $50 each and are worth every penny for long-term docking.
Regular Inspection Checklist for Long-Term Dockage
- Check for fraying: Run hands along the line, feeling for broken fibers.
- Examine the UV exposure: Look for whitening or discoloration in the outer braid.
- Test for stiffness: Lines that feel crunchy have lost their flexibility and need replacement.
- Inspect chafe guards: Ensure they haven’t shifted or worn through.
- Verify knots and splices: Retie any that look loosely wrapped.
Which Dock Line Layout Works Best for Slips vs. Side Ties?
For a slip (the boat fits between two finger piers), you use both bow and stern lines plus spring lines that run diagonally. For side ties (the boat lies parallel to a long dock), you need crossing lines to prevent the boat from swinging sideways.
Securing in a Standard Slip with Fingers
Tie bow lines to pilings at the end of the dock, stern lines to cleats on the finger piers, and spring lines from the bow to the midship cleat. This creates a triangle of support that keeps the boat centered in the slip even in wakes.
Effective Side-Tie Arrangements
Use two bow lines going to cleats at angles, two stern lines similarly angled, and two spring lines running both directions. The key is to create a pattern where the lines are almost parallel to the dock, not perpendicular—this prevents the boat from moving side to side.
Adapting for High-Traffic Areas
If your marina has heavy boat traffic creating frequent wakes, add extra fenders—pilings with large rubber foam bumpers—alongside the dock, and use additional lines on the affected side. Adjust the slack to allow less movement.
When Should You Replace Your Boat Dock Lines?
Replace immediately if you see visible fraying, broken strands, or discoloration from UV damage. Even without visible damage, you should replace your nylon dock lines every two to three years if they’re used daily, or every four to five years with seasonal use.
Signs of UV Degradation
Nylon exposed to constant sunlight will eventually weaken. If the line feels stiff, has a powdery texture, or the color has faded significantly, the polymers are breaking down. Don’t risk it—replace them.
Why Nylon Gets Stiff and What That Means
Over time, nylon absorbs salts and moisture, making it brittle. This stiffness means the line has lost its elasticity, and its ability to absorb shock is drastically reduced. A stiff line behaves like a rope made of plastic—it snaps under dynamic loads.
Storage Tips to Extend Line Life
Rinse your dock lines with fresh water after exposure to saltwater, dry them flat in the sun, then coil and store in a dry, dark place. Avoid leaving them on a hot deck in visible light for extended periods. Proper storage extends the life by 30-50%.
Frequently Asked Questions
How long should dock lines be?
Dock lines should be at least 1.5 times the length of your boat, and often longer for tidal areas. For a 30-foot boat, use lines around 45-50 feet to provide enough slack for tide movement and quick adjustments.
What is the best rope material for dock lines?
Nylon is the best all-around material because of its high strength, excellent stretch, and UV resistance. For short-term or freshwater use, polyester can work, but nylon’s shock absorption makes it the professional choice.
Can I use any rope as a dock line?
No. Non-marine ropes from hardware stores lack UV inhibitors and degrade quickly. They also don’t have the correct stretch properties, making them dangerous when your boat is moving with waves. Invest in marine-grade nylon.
How tight should dock lines be?
Dock lines should be snug—not taut. Leave about 2-3 inches of slack for small boats, and up to 6 inches for larger vessels. This slack allows the boat to move with waves and tides without putting excessive strain on the cleats.
What is the best knot for dock lines?
The cleat hitch is the most practical and widely used knot for securing to cleats. The bowline is ideal for creating a fixed loop around a piling. The rolling hitch is essential for tying to a mooring line.
How often should I inspect my dock lines?
Inspect before every departure and after any storm. For unattended boats, check at least monthly. Look for fraying, discoloration, and stiffness, and replace lines every 2-5 years depending on usage and climate.
Final Thoughts on Securing Your Vessel
Securing your boat with strong dock lines isn’t just about buying the most expensive rope—it’s about understanding how materials, knots, and configurations work together to keep you safe. Invest in quality nylon lines, use the proper hitch, add chafe guards, and always plan for tides and weather.
Take a moment today to inspect your current dock lines. If you spot any damage, don’t postpone the replacement. A broken line can turn a beautiful day into a costly disaster.